Individual 3-D Printing Assignment
For the 3-D printing rotation, there were four options for projects to create:
I decided to design and print the coin holder.
- A decorative phone holder
- An organizational device that holds 50 pennies, 40 nickels, 50 dimes, and 40 quarters
- A device that neatly holds 4 toothbrushes
- A device that organizes a pair of earbuds and its cords
I decided to design and print the coin holder.
Preliminary Research
In order to design a functional coin holder, I first needed to research the specifications for United States coins. The individual coin dimensions are from usmint.gov. Additionally, by multiplying the required number of coins by each coin's height, I found the height required for the coin holder to hold the required number of coins.
| Coin | Diameter (in.) | Height (in.) | Coins Held | Coin Stack Height (in.) |
|---|---|---|---|---|
| Penny | 0.750 | 0.060 | 50 | 3.000 |
| Nickel | 0.835 | 0.077 | 40 | 3.080 |
| Dime | 0.705 | 0.054 | 50 | 2.700 |
| Quarter | 0.955 | 0.069 | 40 | 2.760 |
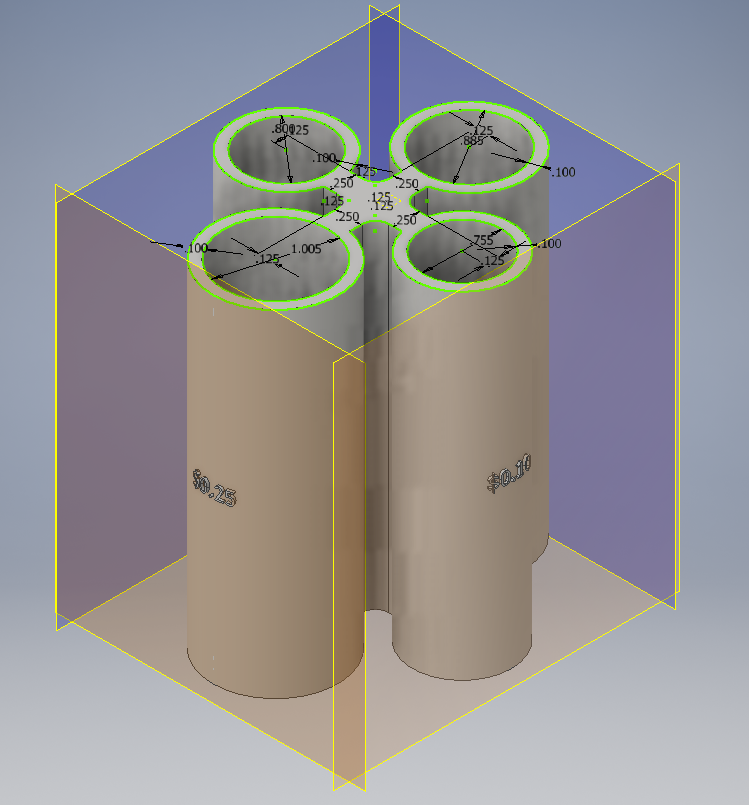
Designing the Coin Holder
With pertinent research complete, I began designing potential devices that could hold the required coins.
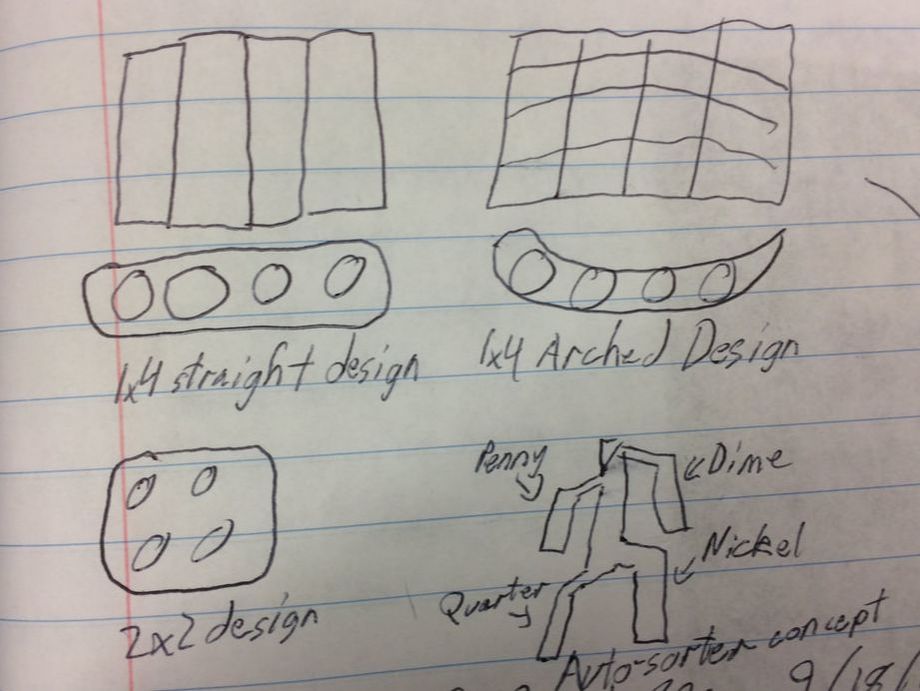
However, after some time, I considered a design that would be more material efficient. The diameters of the holes are also slightly greater than the diameters of the coins themselves.
Printing
With the design complete, I exported it to the MakerBot printer's format.
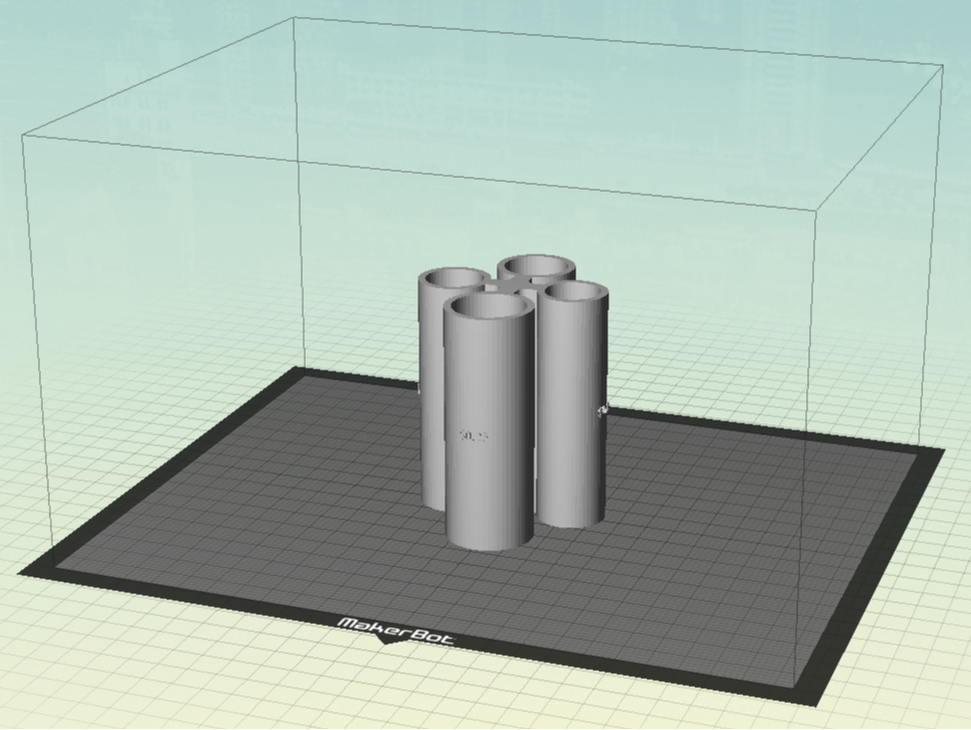
Before exporting the file, I previewed it to ensure it would print correctly.
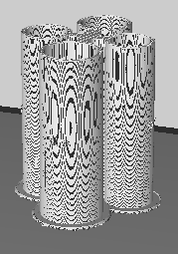
After this, I exported the file to the printer's format, put it on a USB, and set up one of the 3-D printers. The print took 17 hours, so I couldn't capture the entire process. However, I was able to take pictures throughout the first six hours.
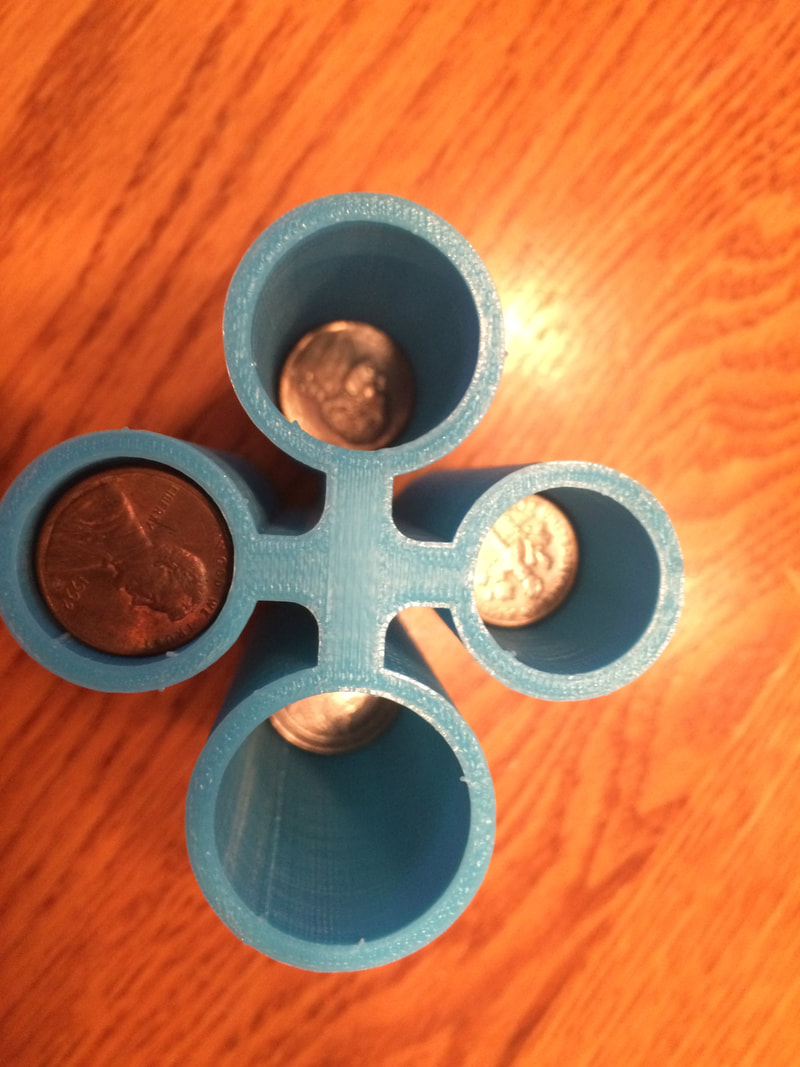
On Monday morning, I retrieved the coin holder from the printer. Here is the end result:
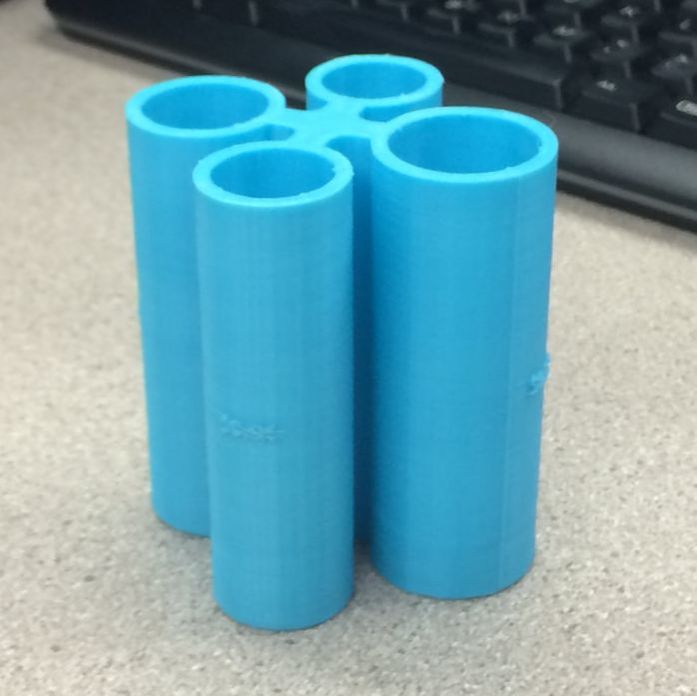
The coin holder printed with correct dimensions, so coins fit flawlessly in their respective chambers.
Conclusion
From preliminary research to final design, the 3-D printed coin holder has been a great project to work on. By doing this project, I was able to experiment more with Autodesk Inventor's features, and I also increased my knowledge of using a 3-D printer. If I were to repeat this project, I would create an alternative way to label the different coin chambers as the embossing was somewhat distorted in the final print.
